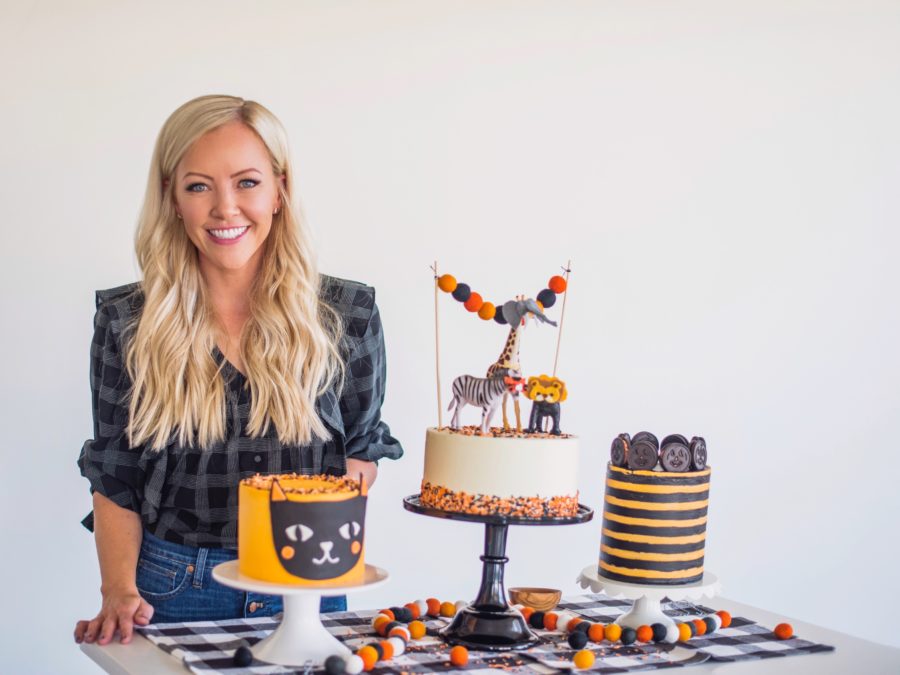
When Halloween rolls around, it’s all about desserts that are spooky and delicious… but sometimes cute and fun work too!
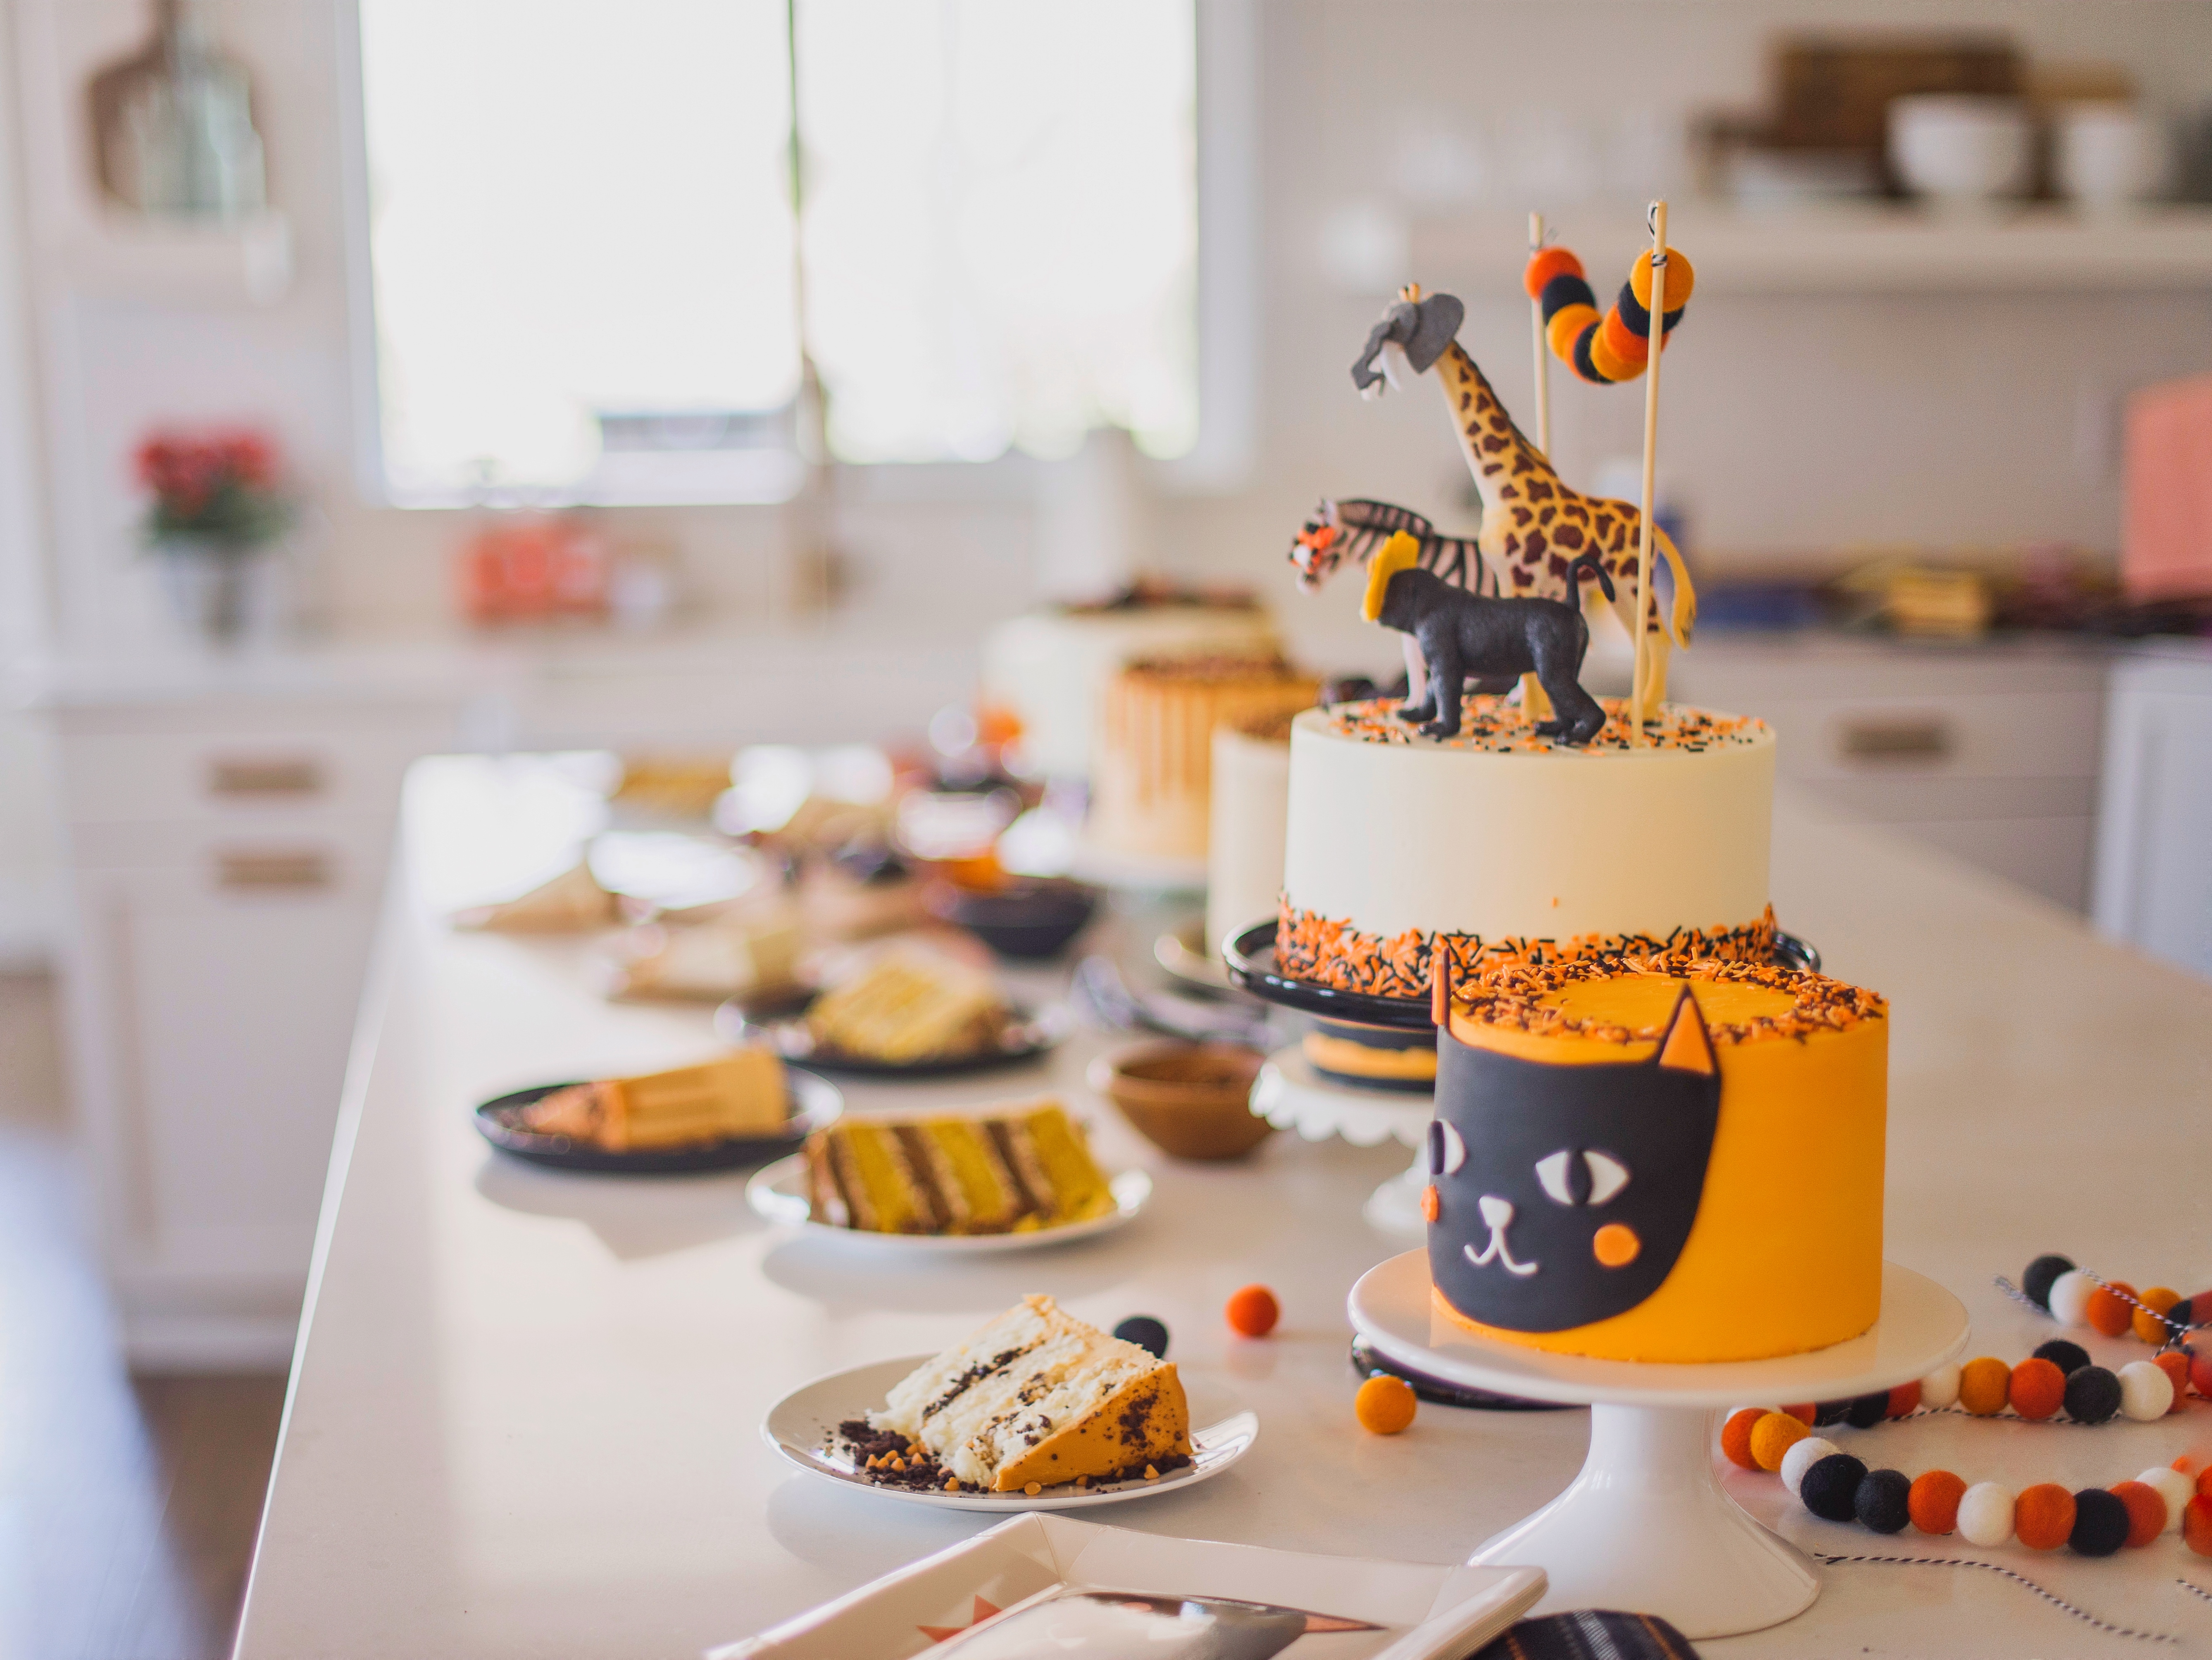
My Black Cat Cake is just that. With a rich black chocolate cake and vanilla buttercream tinted orange, this cake is playful, polished, and perfect for any Halloween table.

Why You’ll Love My Black Cat Halloween Cake
- Striking & fun design — the cat face and ears are charming without being overly complex.
- Deep chocolate flavor — your guests will taste real chocolate, not just color.
- Versatile — you get to choose what your cat looks like and what color to tint the buttercream.
- Beginner-friendly decorating — I use fondant for accents so the design stays crisp without needing expert piping.
- Great centerpiece — it’s eye-catching and makes for awesome photos and party conversation.
- Adaptable for any size — you can scale it up or down for your needs.
What You’ll Need for the Black Cat Cake Recipe
To put together my black cat cake idea, you’ll need the following ingredients for the chocolate cake insides and my delicious vanilla buttercream outsides.
Ingredients
For the Chocolate Cake:
- 2 cups (240 g) all-purpose flour
- 1 3/4 cups (350 g)granulated sugar
- 3/4 cup (88.5 g) Cacao Barry Extra Brute Cocoa Powder or similar premium brand
- 2 teaspoons (8 g) baking soda
- 3/4 teaspoon (3 g) baking powder
- 1 teaspoon (6 g) salt
- 3 eggs, room temperature
- 1 cup (240 g) buttermilk, room temperature
- 1 cup (236.6 g) hot water or coffee
- 1/2 cup (109 g) vegetable oil
- 1 teaspoon (4.2 g) pure vanilla extract
For the Buttercream:
- 2 cups (452 g) unsalted butter, chilled (I take the butter out of the fridge 30 minutes before I make my frosting)
- 6 cups (750 g) powdered sugar, measured and then sifted
- 1/4 cup (57.75 g) heavy whipping cream
- 2 teaspoons (8.4 g) pure vanilla extract
- Pinch of salt
*This buttercream recipe makes enough to fill and cover your cake. If you want to add additional piping, you’ll want to make an extra 1/2 batch.
Equipment
- Offset spatula and straight spatula for frosting
- Piping bag (for small details, optional)
- Rolling pin (for fondant)
Razor blade or small knife (for cutting fondant shapes) - Turntable (helps with smooth frosting)
How to Make the Black Cat Cake
Step 1. Prep Your Pans
Preheat the oven to 325°F. Spray four 6-inch (or three 8-inch) round pans with nonstick spray, line with parchment, then spray again. No one likes a stuck cake!
Step 2. Make the Cake Batter
For the black chocolate cake, combine flour, sugar, cocoa, baking soda, baking powder, and salt in your stand mixer with the paddle attachment on low.
In a separate bowl, whisk together buttermilk, oil, eggs, water, and vanilla.
Slowly pour the wet ingredients into the dry while mixing on low. Scrape the sides, add your black food gel, and mix for 20 seconds.
Step 3. Bake and Chill
Divide batter evenly into pans (about 11-12 oz for 6-inch or 15-16 oz for 8-inch).
Bake for 22-25 minutes. Let cool in pans for 10 minutes, then transfer to a cooling rack. Once completely cool, level the layers (if needed), wrap in plastic, and freeze for at least an hour.
Complement your kitchen with my baking tools ⤵
Step 4. Make the Vanilla Buttercream
Beat butter until fluffy (5 minutes). Add powdered sugar slowly, then vanilla, salt, and cream. Beat on medium-high for 5 minutes until light and dreamy.
Tint the buttercream as desired.
Step 7. Stack with Style
Assembly time! Place a cake board on your turntable. Pro tip: Put a Silpat mat under the cake board to keep it from slipping.
Add your first layer and evenly spread buttercream over the cake. Get eye level to ensure it’s even. Stack and frost remaining layers, placing the final layer upside down (crumb side against frosting) for a smooth top.
Step 8. Frost the Cake
Apply a thin coat of the vanilla buttercream over the entire cake—this is your crumb coat. Freeze for 15 minutes to set everything in place.
Once set, apply the remaining frosting to create your final smooth (or textured) finish. Now you’re ready for the cat decorations!
→ Get the full detailed recipe instructions here.
Tips for the Perfect Black Cat Cake Design
These tips will help your cake look sharp and polished:
- Start with a crumb coat: After you stack the cake layers, apply a thin base coat of buttercream, chill for about 15 minutes, then add your final frosting layer. This helps avoid crumbs getting on your surface.
- Roll fondant thinly: Thinner fondant layers look more professional. You want ears and details to look clean, not bulky.
- Use reference shapes: Before cutting fondant for ears and eyes, sketch or loosely cut paper templates to check proportions.
- Add details last: Apply whiskers, eye glints, and tiny accents at the end so they stay crisp.
- Smooth edges gently: Use gentle strokes when smoothing the buttercream — too much pressure can distort shapes.
Purrrrrerfect Cake for Any Cat-Loving Occasion
My Black Cat Cake is all about fun and finesse — it strikes that sweet spot between cute and classy. The rich chocolate inside, paired with a vanilla buttercream, means you get both flavor and visual impact.
Make it your Halloween showpiece, share slices with friends and family, and be proud when people ask, “Where did you get that cake?”
It even works amazingly as a black cat birthday cake idea for the special feline fanboy or fangirl in your life.
If you make one, tag me @cakebycourtney — I’d love to see your version of the kitty! Be sure to visit my collection of more Halloween cake ideas, where you’ll be spoilt for choice.
For the Chocolate Cake
- 2 cups (240 g) all-purpose flour
- 1 ¾ cups (350 g) granulated sugar
- ¾ cup (88.5 g) Cacao Barry Extra Brute Cocoa Powder or similar premium brand
- 2 teaspoons (8 g) baking soda
- ¾ teaspoon (3 g) baking powder
- 1 teaspoon (6 g) salt
- 3 eggs room temperature
- 1 cup (240 g) buttermilk room temperature
- 1 cup (236.6 g) hot water or coffee
- ½ cup (109 g) vegetable oil
- 1 teaspoon (4.2 g) pure vanilla extract
For the Buttercream
- 2 cups (452 g) unsalted butter chilled (I take the butter out of the fridge 30 minutes before I make my frosting)
- 6 cups (750 g) powdered sugar measured and then sifted
- ¼ cup (57.75 g) heavy whipping cream
- 2 teaspoons (8.4 g) pure vanilla extract
- 1 pinch salt
For the Chocolate Cake
-
Preheat the oven to 325 degrees F. Prepare three 8-inch or four 6-inch round cake pans by spraying the bottom and sides with nonstick spray, lining the bottom with parchment paper, and spraying the parchment paper.
-
In a bowl of electric mixer, combine all the dry ingredients.
-
Combine eggs, buttermilk, water, oil and vanilla in a measuring cup and lightly beat with a fork.
-
Add wet ingredients to the dry ingredients, and mix on low speed until combined. Batter will be thin. Scrape sides and mix for another 30 seconds. Divide batter evenly among prepared pans (I like to use a kitchen scale to ensure the batter is evenly distributed – about 15 to 16 ounces in each 8-inch or 12 ounces in each 6-inch).
-
Bake for 23 top 27 minutes (you may need more time depending on your oven), until toothpick comes out with just a few moist crumbs on it. Cool on wire racks for 10-15 minutes, then gently invert onto racks until cooled completely.
-
When cakes are completely cooled, I like to wrap each cake layer individually with plastic wrap and stick it in the refrigerator or freezer until I’m ready to frost. The cake will be easier to work with if it’s cooled a bit. If I’m making the cake a day or two before I actually need to frost it, I put it in the freezer to ensure freshness. If I’m frosting same-day, I’ll just put it in the refrigerator to chill until needed.
For the Buttercream
-
In the bowl of a stand mixer fitted with a paddle attachment, cream the butter for about 2 minutes. This will soften the butter without it having to be warm.
-
With the mixer on low speed, gradually add the sifted powdered sugar, one cup at a time, mixing a little in between each addition.
-
With mixer on medium speed, add whipping cream, vanilla and salt.
-
Turn the mixer to medium-high speed and beat for an additional 5 to 7 minutes. The frosting will become lighter in color and texture.
-
Before spreading on your cake, spend a couple minutes mixing the buttercream by hand with a wooden spoon to push out the air pockets.
Assembly
-
Place the first cake layer, top side up and spread about 3/4 cup of frosting on top. Make sure to get eye level with the cake to ensure the frosting is spread evenly over the cake.
-
Repeat this step until you get to the final cake layer, which you will lay top side down.
-
Apply a thin coat of frosting around the entire cake to lock in the crumbs. Freeze for about 10 minutes.
-
After the crumb coat is set, continue frosting and decorating the cake.
*This buttercream recipe makes enough to fill and cover your cake. If you want to add additional piping, you’ll want to make an extra 1/2 batch.
#Cute #Black #Cat #Cake #Halloween #Birthday #Fun