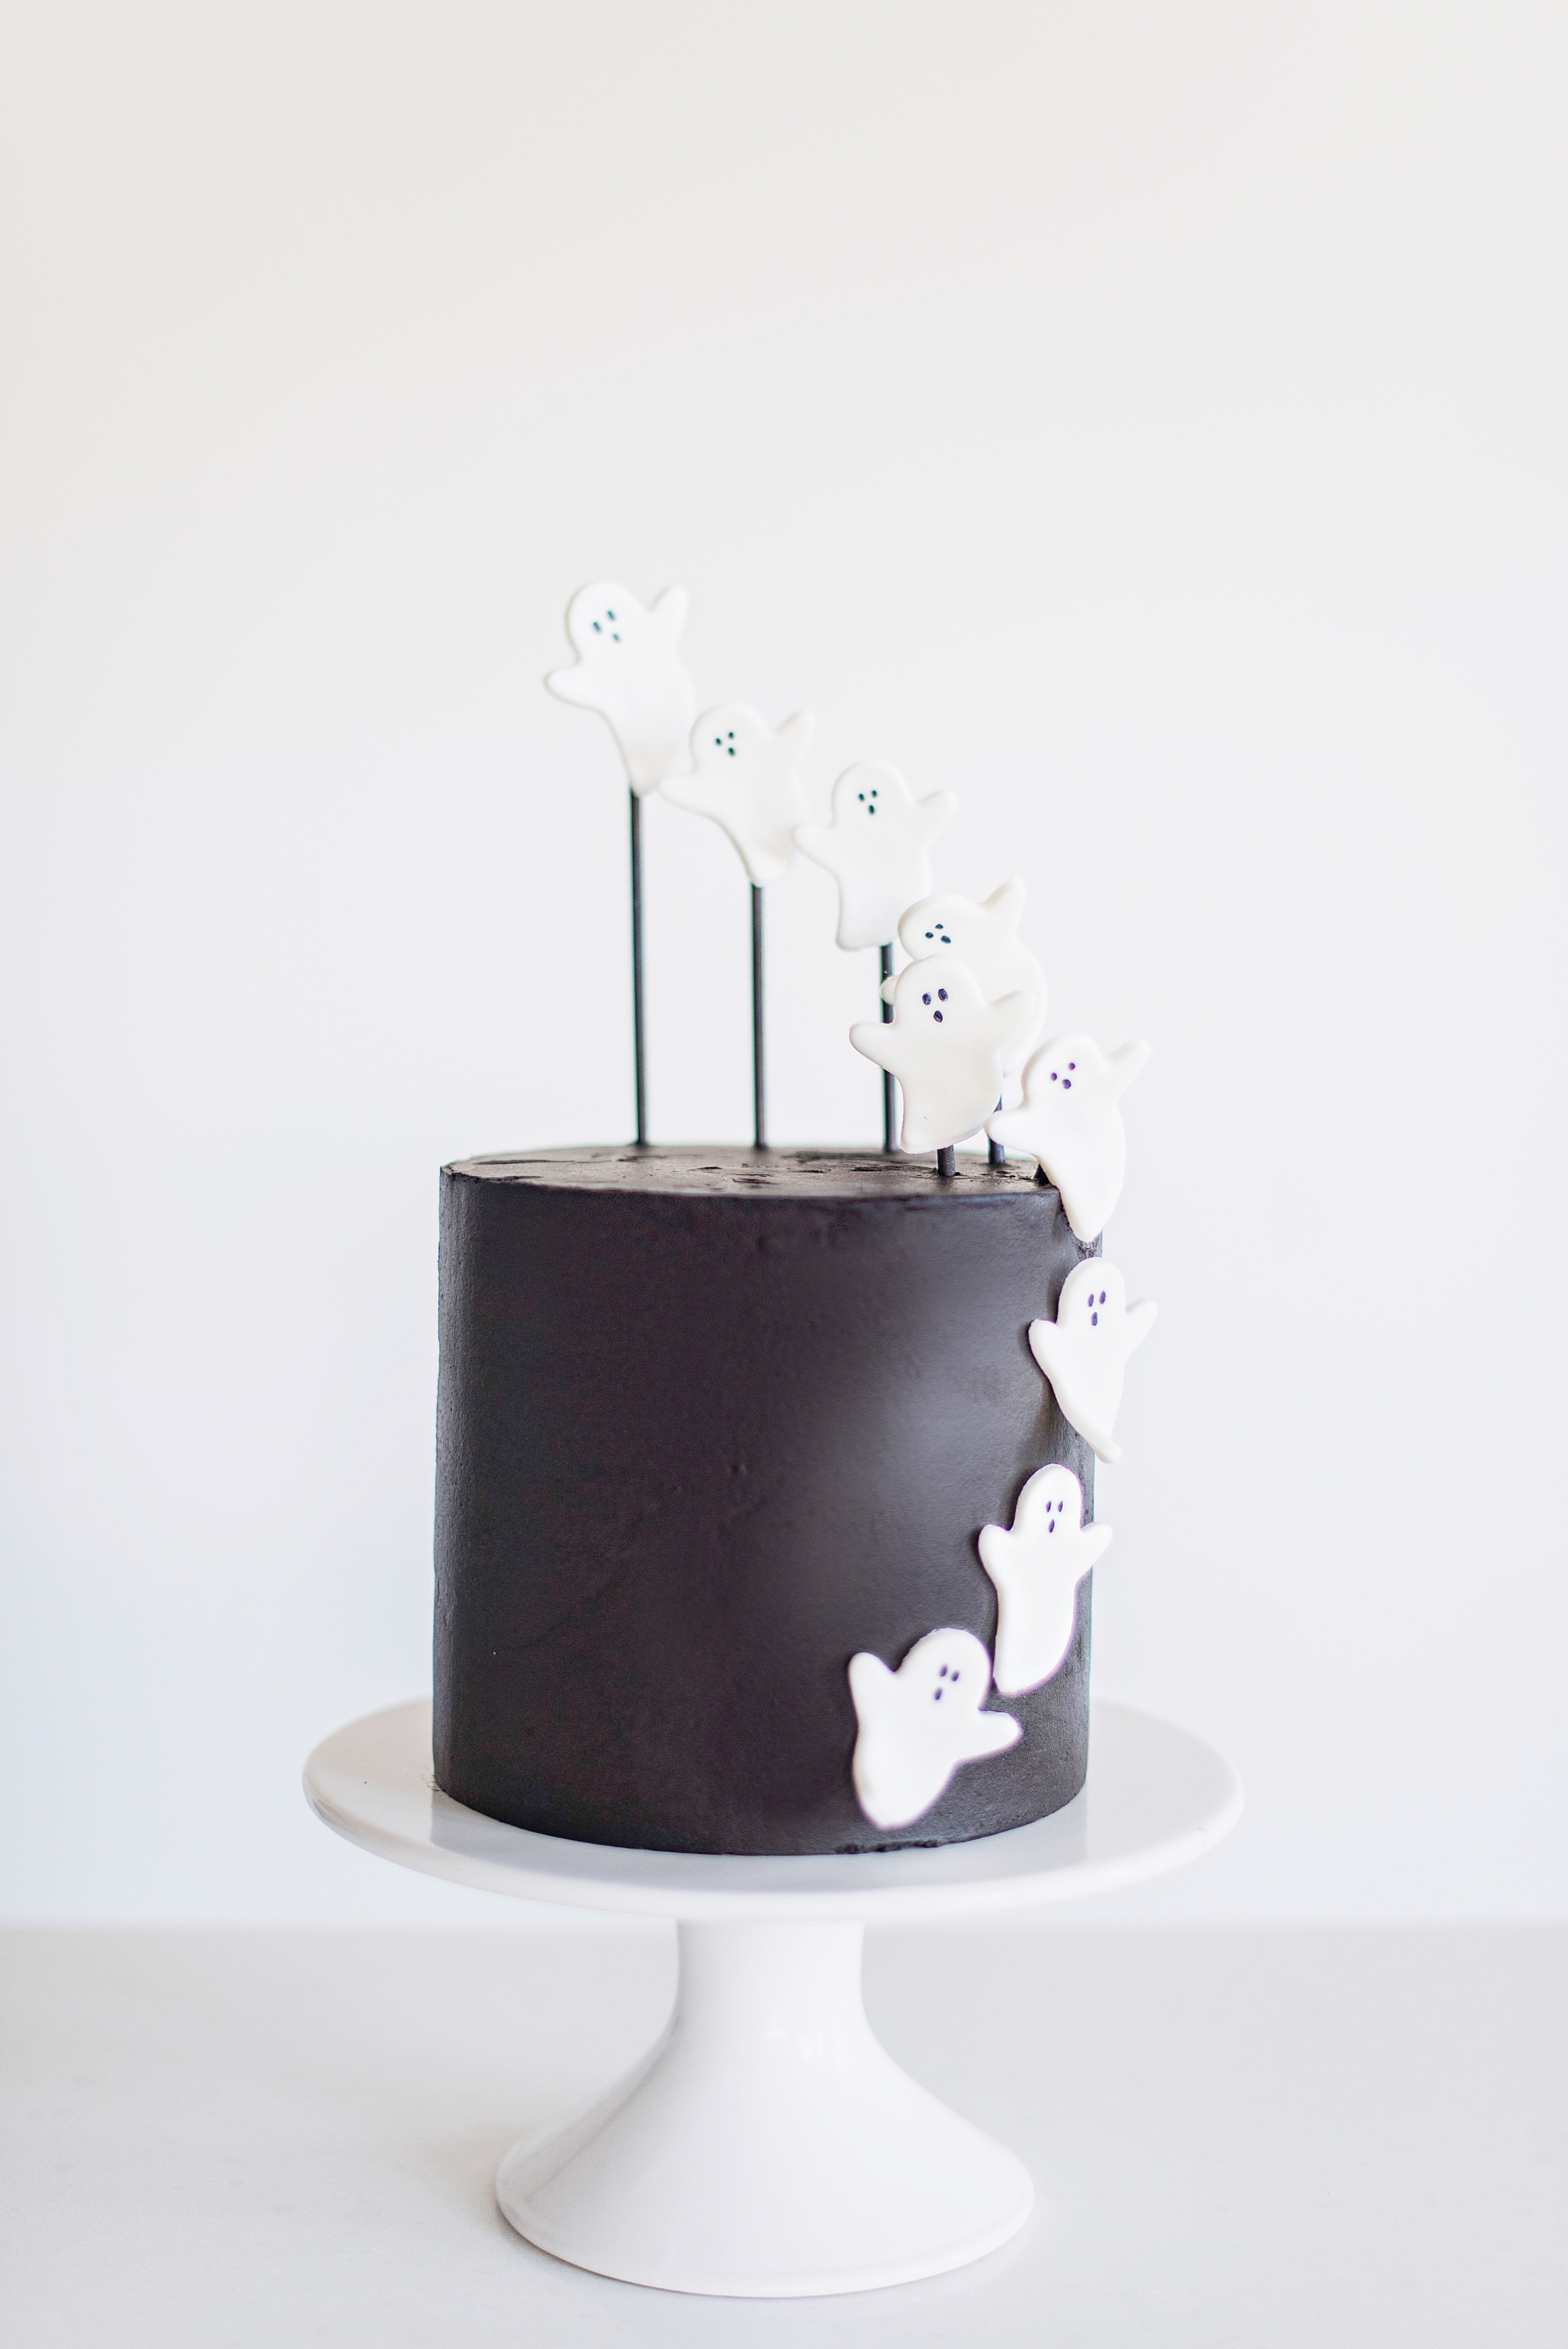
If you love spooooky cakes for Halloween, then you’re going to love this Ghost Cake. It’s a playful and tasty cake that’s perfect for Halloween parties or fall birthdays.
Delicious black buttercream is decorated with whimsical white fondant ghost cake pops that seem to float right off the cake.
This design is simple enough for beginners yet eye-catching enough to be the star of any Halloween dessert table. Let me show you how to make this spooky Ghost Cake!
What You’ll Need for This Cute Ghost Cake
Ingredients
For the Cake Layers:
- 2 cups (240 g) all-purpose flour
- 1 3/4 (350 g) granulated sugar
- 3/4 cups (88.5 g) good-quality black cocoa powder
- 2 teaspoons (8 g) baking soda
- 3/4 teaspoon (6 g) salt
- 1 cup (240 g) buttermilk, room temperature
- 1/2 cup (109 g) vegetable oil
- 3 large eggs, at room temperature
- 1 teaspoon (4.2 g) pure vanilla extract
- 1 cup (236.6 g) hot water or coffee
- 1 teaspoon food gel in Super Black
For the Buttercream:
- 2 cups (452 g) unsalted butter, slightly chilled
- 5 cups (625 g) powdered sugar, measured and then sifted
- 1 cup (118 g) good-quality black cocoa powder
- 3/4 cup (177.5 g) hot water
- 1 1/2 teaspoons (6 g) pure vanilla extract
- Generous pinch of salt
- 8 ounces (150 g) premium dark chocolate, chopped or chips, melted
- 1-2 teaspoons (3-6 g) food gel in Super Black
Equipment
How to Make a Halloween Ghost Cake Step By Step
It’s time to put together one of my favorite ghost cake ideas to wow your family and friends this Halloween:
1. Roll & Cut the Fondant Ghost Decorations
First, dust your surface lightly with cornstarch.
Roll out white fondant to about ¼-inch thick.
Use a ghost cookie cutter to cut out the spooky shapes.
2. Shape & Dry
Gently drape each cut-out over the edge of a small cookie sheet or rolling pin to give the ghosts a little “flowing” curve.
Let the fondant ghosts dry overnight to maintain their shape.
3. Add Faces
Once dry, use an edible black marker to draw cute ghost faces—think round eyes and a tiny “O” mouth.
Complement your kitchen with my baking tools ⤵
4. Make the Toppers
Melt the chocolate chips until smooth.
Dip the top of each candy stick in the melted chocolate and gently attach it to the back of a fondant ghost.
Lay flat until the chocolate sets and the ghost is securely in place.
5. Decorate the Cake
Frost your cake with the black buttercream recipe below or another buttercream recipe of your choosing.
Use a small dab of buttercream as “glue” to attach some ghosts directly to the sides of the cake.
Insert the candy-stick ghosts into the top for a floating, 3-D effect.
→ Get the full detailed recipe instructions here.
Tips for the Perfect Ghost Cake
- Keep fondant cool so it doesn’t get sticky while shaping.
- Make different sizes of ghosts for extra movement.
- Use a dark color buttercream base if you want a little contrast behind the white ghosts.
For more spooky cakes you can create, take a look at my favorite Halloween cake ideas here.
For the Cake Layers
- 2 cups (240 g) all-purpose flour
- 1 3/4 cups (350 g) granulated sugar
- 3/4 cups (88.5 g) good-quality black cocoa powder
- 2 teaspoons (8 g) baking soda
- 3/4 teaspoon (6 g) salt
- 1 cup (240 g) buttermilk room temperature
- 1/2 cup (109 g) vegetable oil
- 3 large eggs room temperature
- 1 teaspoon (4.2 g) pure vanilla extract
- 1 cup (336.6 g) hot water or coffee
- 1 teaspoon food gel in Super Black
For the Buttercream
- 2 cups (452 g) unsalted butter slightly chilled
- 5 cups (625 g) powdered sugar measured and then sifted
- 1 cup (118 g) good-quality black cocoa powder
- 3/4 cup (177.5 g) hot water
- 1 1/2 teaspoons (6 g) pure vanilla extract
- 1 generous pinch salt
- 8 ounces (150 g) premium dark chocolate chopped or chips, melted
- 1-2 teaspoons (3-6 g) food gel in Super Black
For the Cake Layers
-
Preheat the oven to 325 degrees F. Spray four 6-inch round cake pans with nonstick spray. Line the bottom of each pan with parchment paper, then spray the pans again.
-
In a large mixing bowl, whisk together the flour, sugar, cocoa powder, baking soda, baking powder, and salt into the bowl.
-
In another bowl, whisk together the buttermilk, oil, eggs, water or coffee, and vanilla.
-
Add the wet ingredients to the dry ingredients and whisk until the dry ingredients are incorporated. Scrape down the sides of the bowl. Add the food gel and mix for another 20 seconds.
-
Pour the batter into the prepared pans (about 11-12 in each of the 6-inch pans or 15 to 16 ounces in each of the 8-inch pans) and bake for 20 to 25 minutes.
-
Cool in the pans for 15 minutes, then turn them out onto a cooling rack and cool completely.
-
Level each cake layer as needed and then wrap in plastic wrap and chill until ready to use.
For the Buttercream
-
In a bowl of stand mixer fitted with paddle attachment, beat the butter on medium-high speed until light and fluffy, about two minutes.
-
In a small mixing bowl, combine the hot water and cocoa powder. The mixture will be thick like a paste. Set aside.
-
In a microwave safe bowl, heat the chocolate chips until melted and smooth. Let cool slightly, but not all the way to room temperature.
-
Reduce the mixer’s speed to medium and slowly stream in the melted chocolate, making sure to scrape down the sides of the bowl occasionally so the chocolate doesn’t harden around the sides of the bowl.
-
Add the cocoa paste (cocoa and water mixture), followed by the vanilla and salt. Beat until incorporated, about 1 minute.
-
Decrease the speed to low and gradually add the powdered sugar. Once the powdered sugar is incorporated, add the black food gel and then beat for about two minutes. The color will likely be grey. Don’t worry. Your next job is to be patient!
-
Let the frosting sit for at least a couple of hours (even a full day is great) because the color will take awhile to process and it’s best to let it sit rather than adding more and more coloring right away.
-
If you’ve let the frosting rest for plenty of time and it’s still not black, add one more teaspoon of black food gel and let it rest a bit more.
-
If your frosting is too soft, cover it with plastic wrap and let it chill in the refrigerator a bit.
Assembly
-
Step 1: Stack the cake layers
-
Place your first cake layer, top side up, on a cake board.
-
Evenly spread about ½ cup to ⅔ cup of the buttercream on top of the cake.
-
Place the next cake layer on the buttercream and spread more buttercream on top.
-
Do this one more time with the third layer.
-
Place the fourth cake layer, top side down, on the last layer of buttercream.
-
Apply a thin layer of buttercream around the entire cake. This is the crumb coat. Freeze the cake for 15 minutes to set the crumb coat.
-
Step 2: Decorate the cake and add the ghosts
-
Once the crumb coat has set, continue frosting the cake with the remaining buttercream.
-
Carefully place a fondant ghost toward the bottom of the cake. It should stick to the “wet” buttercream.
-
Continue adding ghosts up the side of the cake.
-
Once you get to the top of the cake, place the ghosts with the candy sticks on top in ascending order to make it look like they’re flying away.
#Easy #Ghost #Cake #Cute #Halloween #Fun