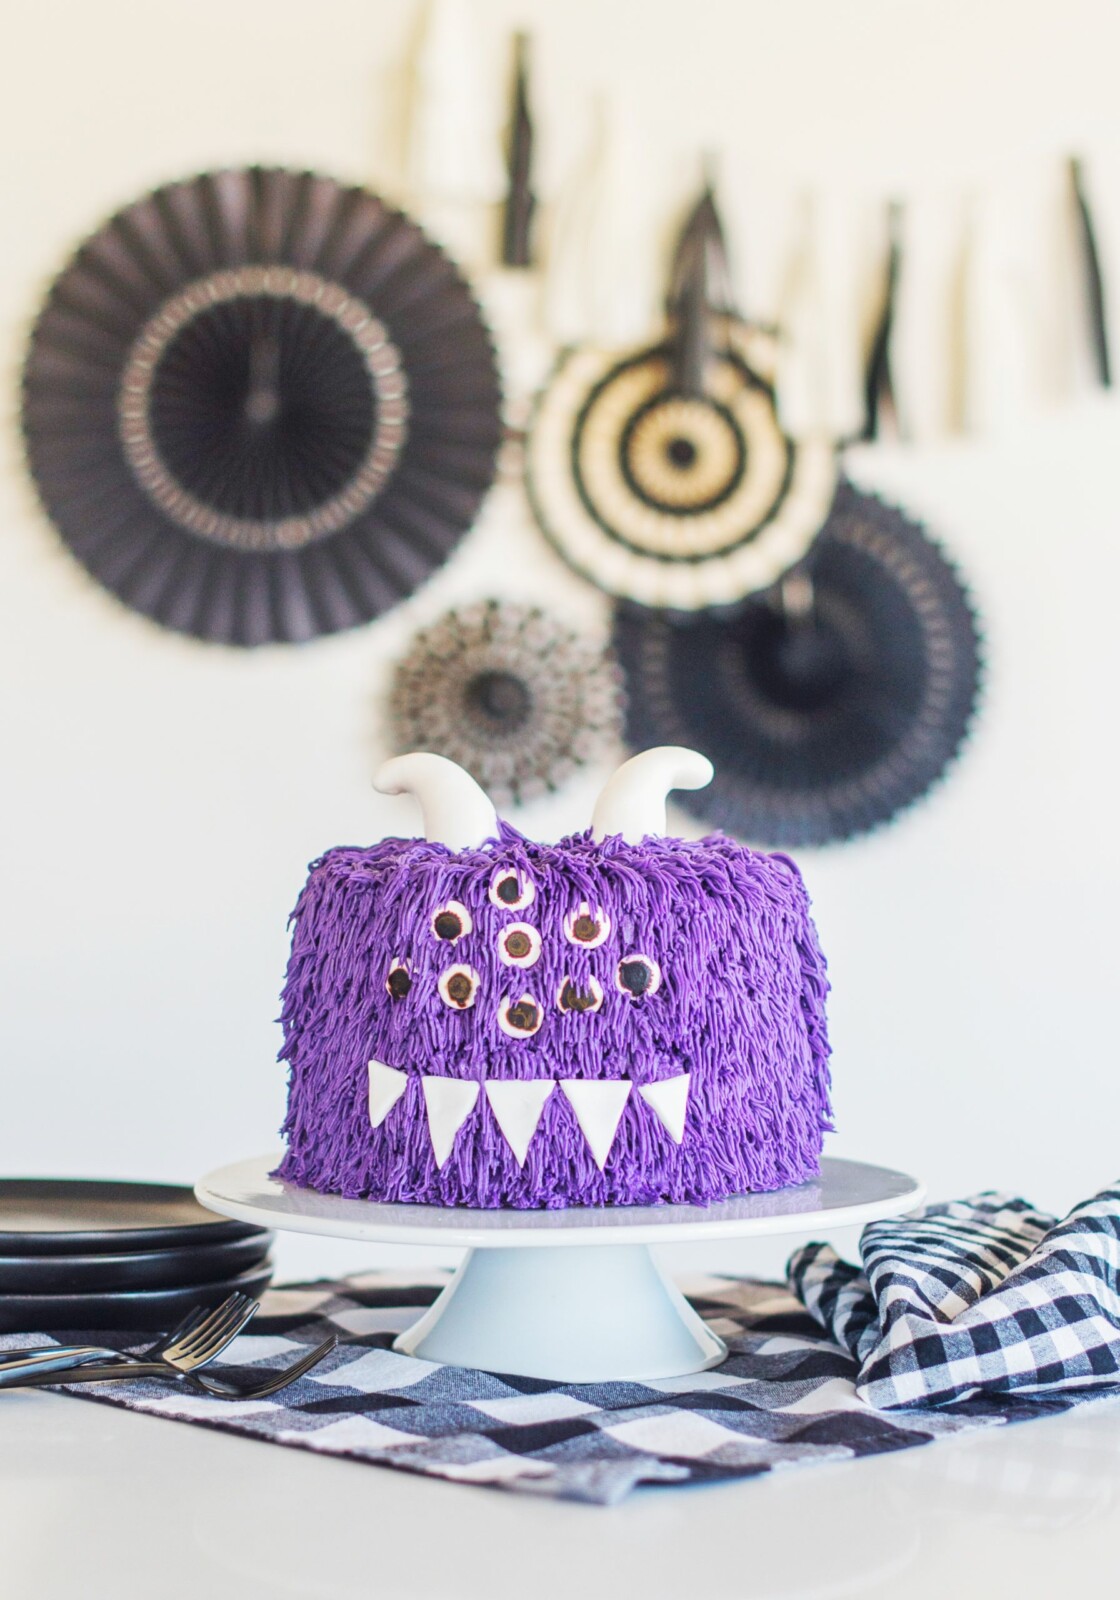
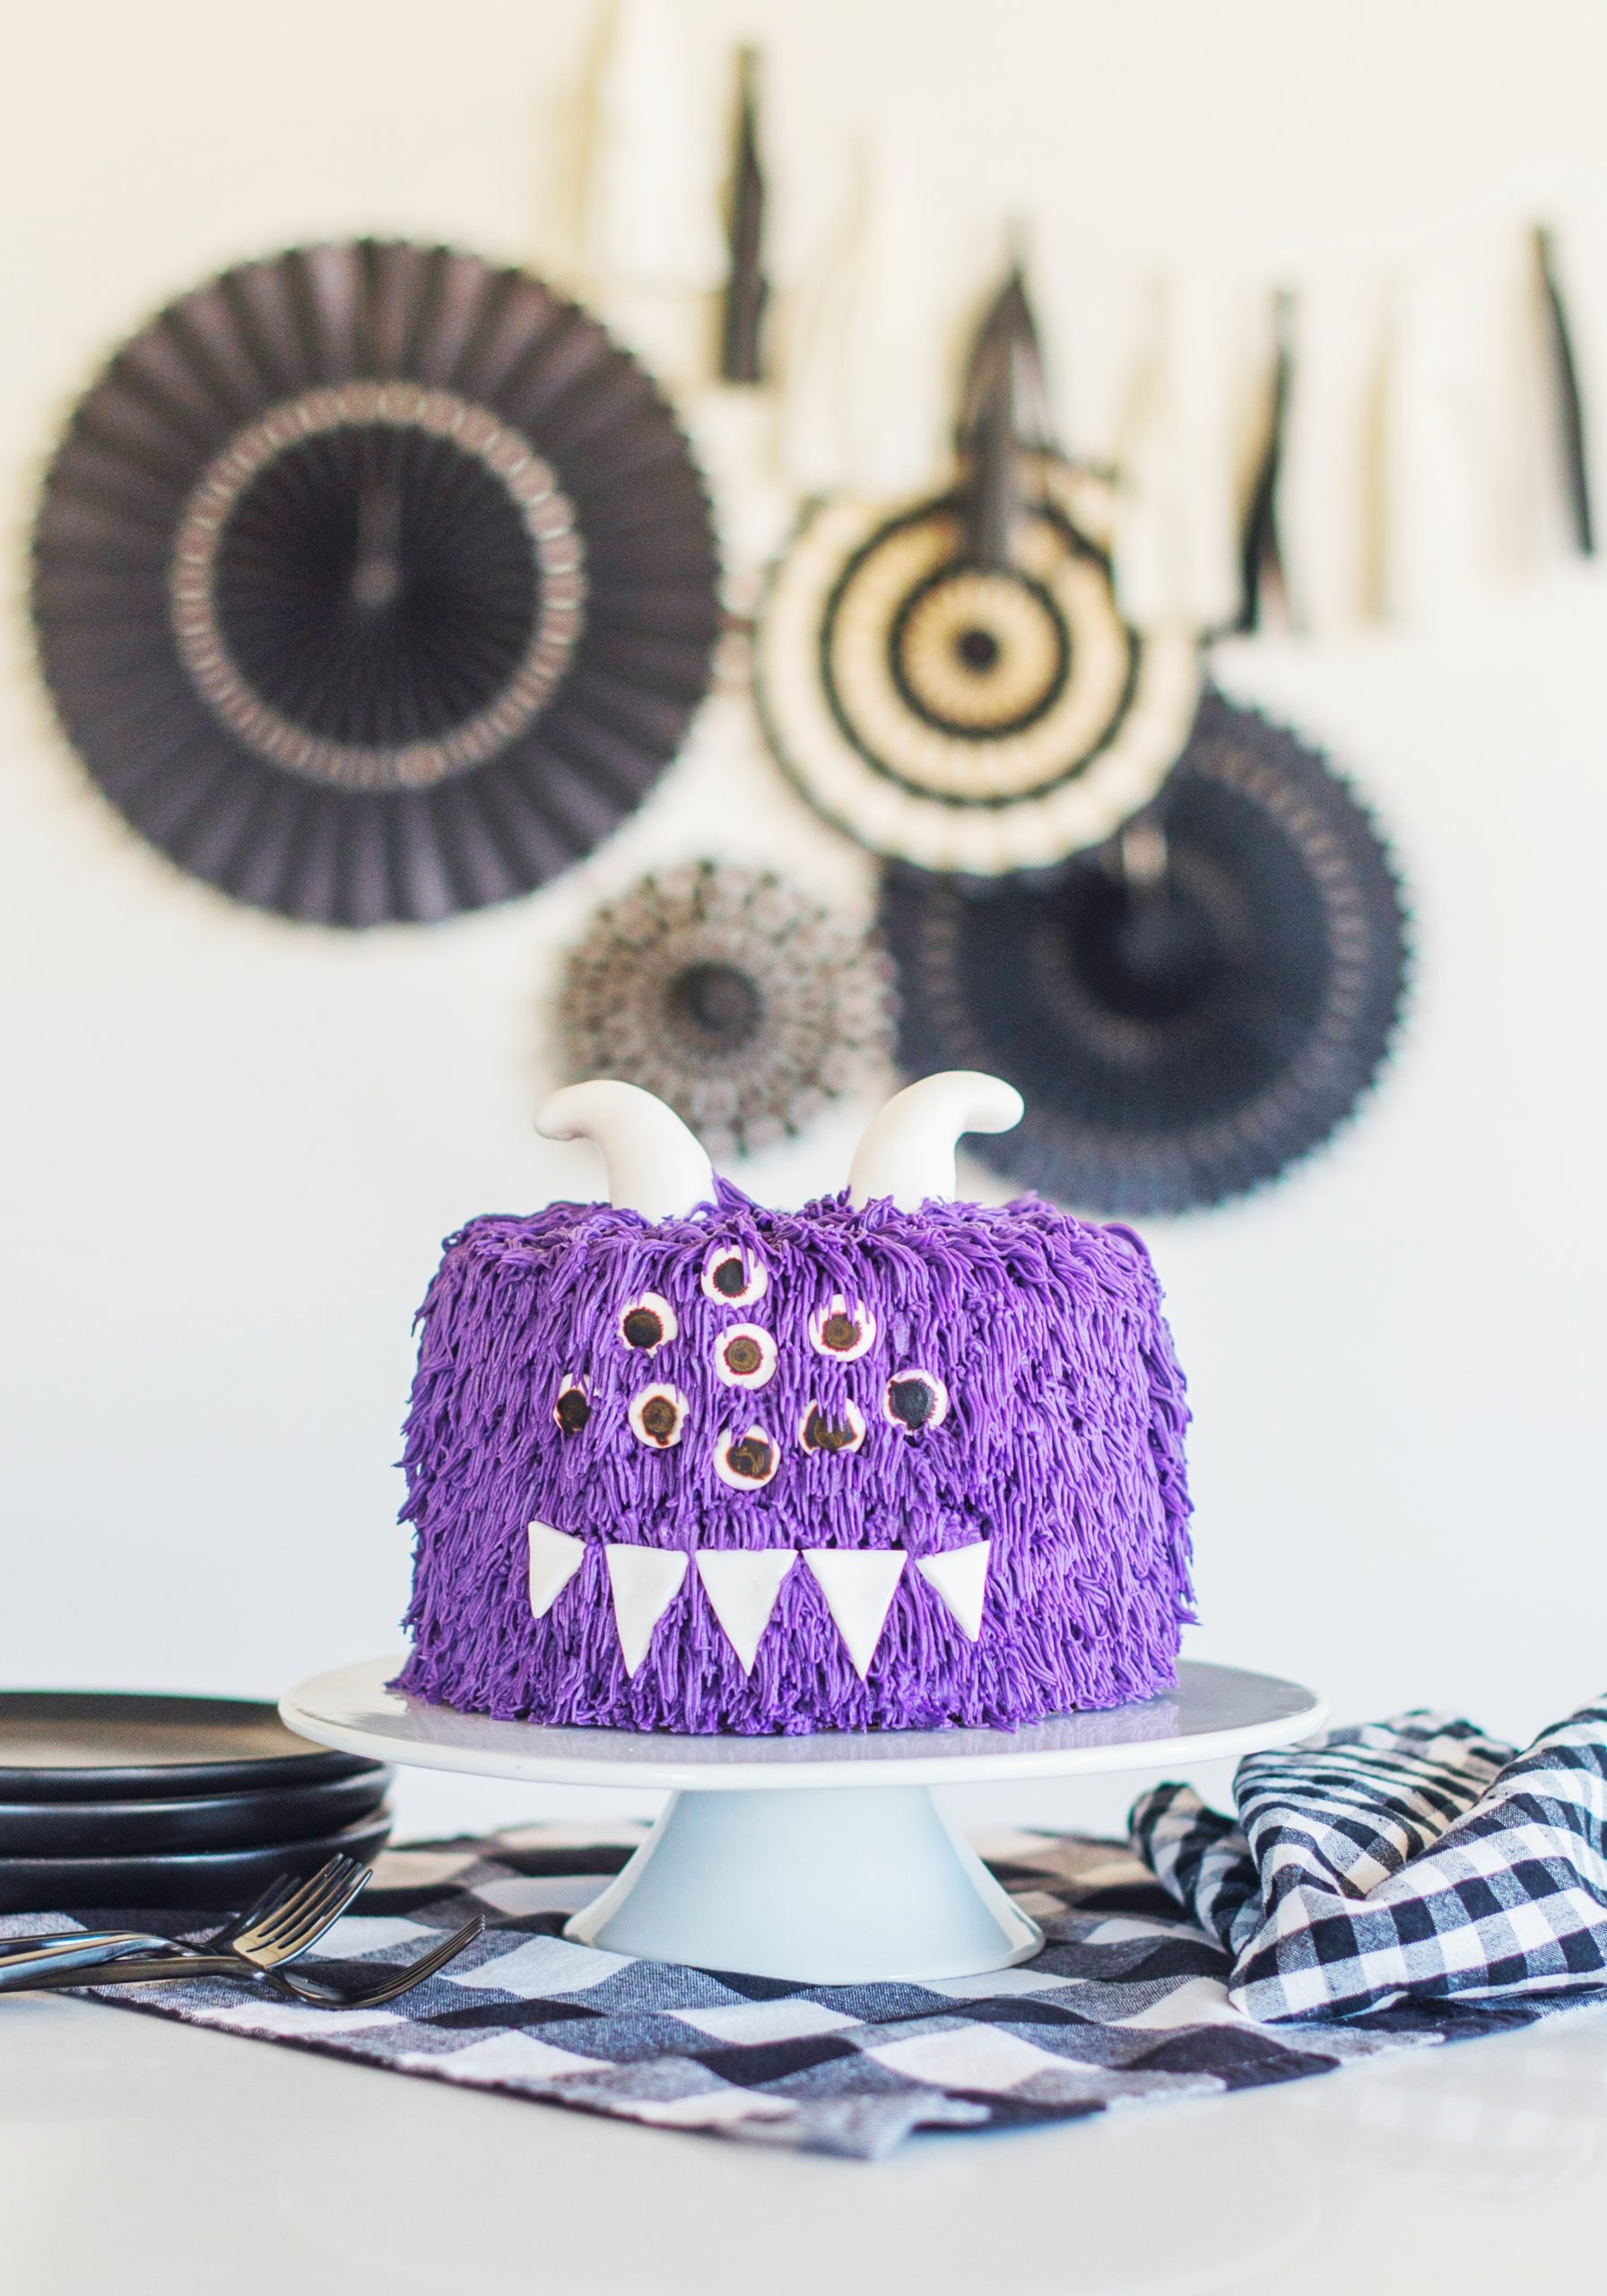
Every year around Halloween, I can’t resist adding something fun and a little whimsical to my cake lineup. This year’s creation? A Monster Cake that’s equal parts spooky and sweet! 👀
This cake is so much fun to make with bright buttercream colors, candy eyes, playful piping, and just enough imperfection to make every monster completely unique. It’s the kind of project that brings the whole family into the kitchen. My kids love choosing the “monster colors” and deciding how many eyes each one gets!
Whether you’re baking it for a Halloween party, a classroom treat, or just a cozy weekend activity, this cake is one that’s scary cute and so simple to make.
What You’ll Need for This Monster Cake
Ingredients
For the Cake:
- 2 cups (240 g) all-purpose flour
- 1 3/4 cups (350 g) granulated sugar
- 3/4 cup (88.5 g) Cacao Barry Extra Brute Cocoa Powder or similar premium brand
- 2 teaspoons (8 g) baking soda
- 3/4 teaspoon (3 g) baking powder
- 1 teaspoon (6 g) salt
- 3 eggs, room temperature
- 1 cup (240 g) buttermilk, room temperature
- 1 cup (236.6 g) hot water or coffee
- 1/2 cup (109 g) vegetable oil
- 1 teaspoon (4.2 g) pure vanilla extract
For the Buttercream:
- 3 cups (678 g) unsalted butter, chilled
- 9 cups (1,125 g) powdered sugar, measured and then sifted
- 6 tablespoons (86.6 g) heavy whipping cream (that’s ¼ cup + 2 tablespoons)
- 3 teaspoons (12.6 g) pure vanilla extract
- Salt
Equipment
How to Make a Halloween Monster Cake Step by Step
Let me guide you on baking one of my favorite monster cake ideas for the spooky season:
1. Stack and Crumb Coat the Cake Layers
Place your first cake layer on a cake board or cake stand, and then evenly spread about a cup of buttercream over the layer.
Repeat this step and then place the final cake layer, top side down, on the second layer of buttercream.
Apply a thin layer of buttercream over the entire cake. Freeze the cake for about 15 minutes to set the buttercream.
2. Pipe on the Buttercream
After you’ve tinted the buttercream (I chose purple), place a grass piping tip in a piping bag, followed by the buttercream.
TIP: Don’t fill the bag more than 2/3rd full with buttercream. Twist the top tightly.
Starting at the bottom of the cake, press the piping tip gently on the side of the cake, apply pressure to the piping bag with your hand, and then slowly pull the piping bag away from the cake with a slight downward motion. You’ll continue to pipe the entire cake, moving upward so the “hair” falls on the layer below it.
Complement your kitchen with my baking tools ⤵
3. Add Faces
Once you’re done piping the buttercream, add the candy eyes by pressing them gently into the buttercream.
Roll out a small portion of the white fondant and cut out teeth. Gently press them onto the buttercream.
For the horns, roll some of the fondant into any shape you’d like. Don’t go too big, as they won’t hold up well. If needed, insert a toothpick at the bottom to secure them into the cake.
→ Get the full detailed recipe instructions here.
Tips for the Perfect Monster Cake
- Keep fondant cool so it doesn’t get sticky while shaping.
- Don’t stress about perfect piping technique. The messier and more uneven, the better.
- Have fun!
This recipe is great for Halloween, but it also makes for an incredible monster birthday cake for the little gremlin in your life at any time of the year.
For more monstrous cakes you can put together, take a look at my favorite Halloween cake ideas here.
For the Cake
- 2 cups (240 g) all-purpose flour
- 1 3/4 cups (350 g) granulated sugar
- 3/4 cup (88.5 g) Cacao Barry Extra Brute Cocoa Powder or similar premium brand
- 2 teaspoons (8 g) baking soda
- 3/4 teaspoon (3 g) baking powder
- 1 teaspoon (6 g) salt
- 3 eggs room temperature
- 1 cup (240 g) buttermilk room temperature
- 1 cup (236.6 g) hot water or coffee
- 1/2 cup (109 g) vegetable oil
- 1 teaspoon (4.2 g) pure vanilla extract
For the Buttercream
- 3 cups (678 g) unsalted butter chilled (take out of fridge 30 minutes before making frosting)
- 9 cups (1,125 g) powdered sugar measured and then sifted
- 6 tablespoons (86.6 g) heavy whipping cream (that’s ¼ cup + 2 tablespoons)
- 3 teaspoons (12.6 g) pure vanilla extract
- Generous pinch salt (this is a 1.5x batch of my vanilla buttercream to ensure you have plenty of buttercream to pipe with)
For the Cake
-
Preheat the oven to 325 degrees F. Prepare three 8-inch or four 6-inch round cake pans by spraying the bottom and sides with nonstick spray, lining the bottom with parchment paper, and spraying the parchment paper.
-
In a bowl of electric mixer, combine all the dry ingredients.
-
Combine eggs, buttermilk, water, oil and vanilla in a measuring cup and lightly beat with a fork.
-
Add wet ingredients to the dry ingredients, and mix on low speed until combined. (The batter will be thin). Scrape sides and mix for another 30 seconds. Divide batter evenly among prepared pans (I like to use a kitchen scale to ensure the batter is evenly distributed – about 15 to 16 ounces in each 8-inch or 12 ounces in each 6-inch).
-
Bake for 23 to 27 minutes (you may need more time depending on your oven), until a toothpick comes out with just a few moist crumbs on it. Cool on wire racks for 10-15 minutes, then gently invert onto racks until cooled completely.
-
When cakes are completely cooled, I like to wrap each cake layer individually with plastic wrap and stick it in the refrigerator or freezer until I’m ready to frost. The cake will be easier to work with if it’s cooled a bit. If I’m making the cake a day or two before I actually need to frost it, I put it in the freezer to ensure freshness. If I’m frosting same-day, I’ll just put it in the refrigerator to chill until needed.
For the Buttercream
-
In the bowl of a stand mixer fitted with a paddle attachment, beat the butter for about 2 minutes. This will soften the butter without it having to be warm.
-
With the mixer on low speed, gradually add the sifted powdered sugar, one cup at a time, mixing a little in between each addition.
-
With the mixer on medium speed, add whipping cream, vanilla and salt.
-
Turn the mixer to medium-high speed and beat for an additional 5 to 7 minutes. The frosting will become lighter in color and texture.
-
Add food coloring and stir until well blended.
-
If using more than one color, separate the buttercream into separate bowls and add desired color in each bowl. Mix well.
Assembly
-
Place the first cake layer, top side up and spread about 1 cup of buttercream on top. Make sure to get eye level with the cake to ensure the frosting is spread evenly over the cake.
-
Repeat this step until you get to the final cake layer, which you will lay top side down.
-
Apply a thin coat of frosting around the entire cake to lock in the crumbs. Freeze for about 15 minutes.
-
After the crumb coat is set, continue decorating the cake with the instructions above.
#Easy #Monster #Cake #Tutorial #KidFriendly #Halloween #Cake