If you’ve followed me for a while, you know that Halloween is one of my favorite times of year to play with cake design. I love taking classic flavors and turning them into something festive, colorful, and a little unexpected.
This Striped Witch Cake might just be my new favorite. It’s bold, whimsical, and surprisingly simple to make.
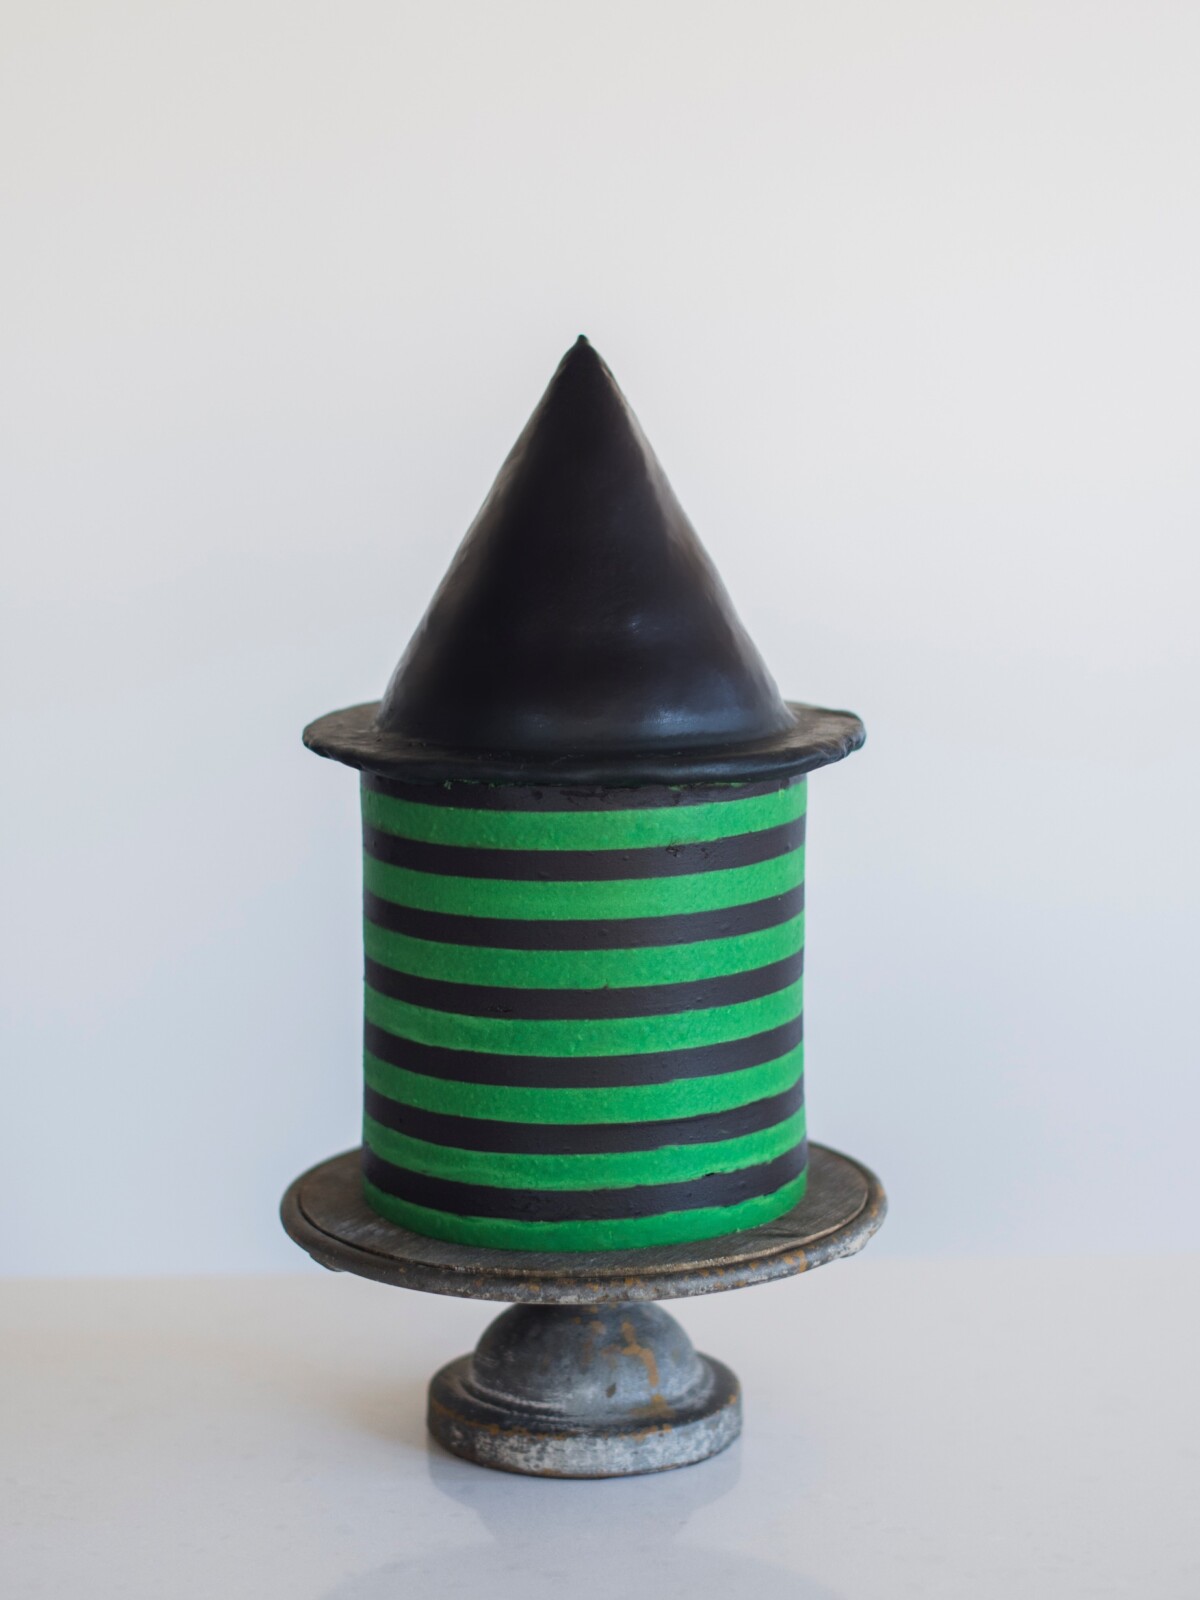
With green and black striped buttercream, a glossy black fondant witch hat, and the most delicious layers of cake underneath. It’s giving full-on Halloween magic — without any tricks, just treats.

The Inspiration Behind My Wicked Striped Witch Cake
When I first dreamed up this witch cake idea, I wanted something that captured that classic witchy look — think emerald-green tones, deep black accents, and a touch of sparkle.
The design came together so beautifully, and the hat topper gives it that perfect “flying off on a broomstick” vibe.
Whether you’re hosting a Halloween dinner, throwing a costume party, or just love to bake something spooky and fun with your family, this cake is guaranteed to steal the show.
The cake features a striped base effect with a witch hat made from Rice Krispies and black fondant.
Feel free to change things up with your own creativity. This could become a witch birthday cake, witch hat cake, or another unique witch-themed cake you could brew up in your cauldron!
What You’ll Need for this Striped Witch Cake
Ingredients
For the Black Chocolate Cake:
- 2 cups (240 g) all-purpose flour
- 1 3/4 (350 g) granulated sugar
- 3/4 cups (88.5 g) good-quality black cocoa powder
- 2 teaspoons (8 g) baking soda
- 3/4 teaspoon (6 g) salt
- 1 cup (240 g) buttermilk, room temperature
- 1/2 cup (109 g) vegetable oil
- 3 large eggs, at room temperature
- 1 teaspoon (4.2 g) pure vanilla extract
- 1 cup (236.6 g) hot water or coffee
- 1 teaspoon food gel in Super Black
For the Black Buttercream:
- 2 cups (452 g) unsalted butter, slightly chilled
- 5 cups (625 g) powdered sugar, measured and then sifted
- 1 cup (118 g) good-quality black cocoa powder
- 3/4 cup (177.5 g) hot water
- 1 1/2 teaspoons (6 g) pure vanilla extract
- Generous pinch of salt
- 8 ounces (150 g) premium dark chocolate, chopped or chips, melted
- 1-2 teaspoons (3-6 g) food gel in Super Black
For the Vanilla Buttercream:
- 1 cup (226 g) unsalted butter, chilled (set out 30 minutes before using)
3 cups (375 g) powdered sugar, measured and then sifted - 2 tablespoons (28.9 g) heavy whipping cream
- 1 teaspoon (4.2 g) pure vanilla extract
- Small pinch of salt
Equipment
- Four 6-inch round cake pans (or three 8-inch pans as an alternative)
- Stand mixer with paddle attachment
- Parchment paper rounds
- Cooling rack
- Cake leveler
- Offset spatula
- Textured cape scraper
- Cake turntable (recommended for smooth frosting application)
- Black fondant (for the hat topper)
- A small paper cone (for shaping the hat topper)
- A round fondant base for the brim
How to Make the Witch Cake Step by Step
My Striped Witch Cake is so much fun to put together, one layer at a time!
Complement your kitchen with my baking tools ⤵
1. Bake Your Cake Layers
Bake three 8-inch (or four 6-inch) cake layers. Let them cool completely before stacking. You can also bake ahead, wrap, and freeze your layers until you’re ready to decorate
2. Stack and Fill
Start with your first cake layer and spread an even layer of green buttercream. Add your next layer and repeat.
3. Crumb Coat and Chill
Apply a thin crumb coat of buttercream and chill the cake for about 15 minutes. This helps lock in crumbs and gives you a smooth base for your stripes.
4. Create the Stripes
To get those clean, even green and black buttercream stripes, I like to use a striped scraper with these extra steps:
- Apply a layer of the black buttercream around the entire cake.
- Smooth with a straight cake scraper, cleaning the scraper between passes.
- Once the sides are even, use the striped scraper to create the indents of stripes.
- Freeze the cake for 30 minutes.
- Using a piping bag filled with the vanilla buttercream (tinted green or another color of your choice), pipe the vanilla buttercream into the open stripes.
- Use the straight scraper to smooth out the sides. Don’t panic when things start to look messy as you do this. This process can take some time, so be patient. Keep scraping until you can clearly see the two colors of stripes.
5. Add the Witch Hat
Roll out your black fondant and shape the hat cone using a paper cone mold (or even a small bowl to help it hold its shape).
Add a flat fondant circle for the brim and let both dry for a few hours before assembling. Once firm, place it carefully on top of your cake.
→ Get the full detailed recipe instructions here.
Tips for Decorating Success
- Freeze for enough time! Before adding the second color of stripes, freeze the entire cake to set the black buttercream.
- Use gel food color — it gives bold color without thinning your frosting.
- Make the hat ahead of time so it’s firm enough to hold its shape when you decorate.
Why You’ll Love This Halloween Witch Cake
This is one of those Witch cake designs that looks impressive but is totally doable — even if you’re newer to decorating. The colors are pure Halloween magic, and the hat adds just enough drama to make it party-perfect.
Plus, it’s delicious! Pairing my smooth vanilla buttercream and black buttercream with rich chocolate cake is a winning combo!
For even more extraordinarily spooky cakes for Halloween, visit my favorite Halloween cake ideas here.
For the Black Chocolate Cake
- 2 cups (240 g) all-purpose flour
- 1 ¾ cups (350 g) granulated sugar
- ¾ cups (88.5 g) good-quality black cocoa powder
- 2 teaspoons (8 g) baking soda
- ¾ teaspoon (6 g) salt
- 1 cup (240 g) buttermilk room temperature
- ½ cup (109 g) vegetable oil
- 3 large eggs room temperature
- 1 teaspoon (4.2 g) pure vanilla extract
- 1 cup (236.6 g) hot water or coffee
- 1 teaspoon food gel in Super Black
For the Black Buttercream
- 2 cups (452 g) unsalted butter slightly chilled
- 5 cups (625 g) powdered sugar measured and then sifted
- 1 cup (118 g) good-quality black cocoa powder
- ¾ cup (177.5 g) hot water
- 1 ½ teaspoons (6 g) pure vanilla extract
- 1 generous pinch salt
- 8 ounces (150 g) premium dark chocolate, chopped or chips melted
- 1-2 teaspoons (3-6 g) food gel in Super Black
For the Vanilla Buttercream
- 1 cup (226 g) unsalted butter chilled (set out 30 minutes before using)
- 3 cups (375 g) powdered sugar measured and then sifted
- 2 tablespoons (28.9 g) heavy whipping cream
- 1 teaspoon (4.2 g) pure vanilla extract
- 1 small pinch salt
For the Chocolate Cake
-
Preheat the oven to 325 degrees F. Spray four 6-inch round cake pans with nonstick spray. (You can also use three 8-inch pans). Line the bottom of each pan with parchment paper, then spray the pans again.
-
In a large mixing bowl, whisk together the flour, sugar, cocoa powder, baking soda, baking powder, and salt into the bowl.
-
In another bowl, whisk together the buttermilk, oil, eggs, water or coffee, and vanilla.
-
Add the wet ingredients to the dry ingredients and whisk until the dry ingredients are incorporated. Scrape down the sides of the bowl. Add the food gel and mix for another 20 seconds.
-
Pour the batter into the prepared pans (about 11-12 in each of the 6-inch pans or 15 to 16 ounces in each of the 8-inch pans) and bake for 20 to 25 minutes.
-
Cool in the pans for 15 minutes, then turn them out onto a cooling rack and cool completely.
-
Level each cake layer as needed and then wrap in plastic wrap and chill until ready to use.
For the Black Buttercream
-
In a bowl of stand mixer fitted with paddle attachment, beat the butter on medium-high speed until light and fluffy, about two minutes.
-
In a small mixing bowl, combine the hot water and cocoa powder. The mixture will be thick like a paste. Set aside.
-
In a microwave safe bowl, heat the chocolate chips until melted and smooth. Let cool slightly, but not all the way to room temperature.
-
Reduce the mixer’s speed to medium and slowly stream in the melted chocolate, making sure to scrape down the sides of the bowl occasionally so the chocolate doesn’t harden around the sides of the bowl.
-
Add the cocoa paste (cocoa and water mixture), followed by the vanilla and salt. Beat until incorporated, about 1 minute.
-
Decrease the speed to low and gradually add the powdered sugar. Once the powdered sugar is incorporated, add the black food gel and then beat for about two minutes. The color will likely be grey. Don’t worry. Your next job is to be patient!
-
Let the frosting sit for at least a couple of hours (even a full day is great) because the color will take awhile to process and it’s best to let it sit rather than adding more and more coloring right away.
-
If you’ve let the frosting rest for plenty of time and it’s still not black, add one more teaspoon of black food gel and let it rest a bit more.
-
If your frosting is too soft, cover it with plastic wrap and let it chill in the refrigerator a bit.
For the Vanilla Buttercream
-
In the bowl of a stand mixer fitted with a paddle attachment, cream the butter for about 2 minutes. This will soften the butter without it having to be warm.
-
With the mixer on low speed, gradually add the sifted powdered sugar, one cup at a time, mixing a little in between each addition.
-
With mixer on medium speed, add whipping cream, vanilla and salt.
-
Turn the mixer to medium-high speed and beat for an additional 5 to 7 minutes. The frosting will become lighter in color and texture.
-
Before spreading on your cake, spend a couple minutes mixing the buttercream by hand with a wooden spoon to push out the air pockets.
#Striped #Witch #Cake #Wicked #Hat #Idea #Halloween